
Hello confused devs of ROBLOX, WoodReviewer here. Today I am not here to just talk about how wood grain should go. Today I am only here to talk about how you rotate wood grain to fix it. Yes, I know. You just rotate and resize the bricks. But that seems to be above what some people are able to do. So lets start at the very basics on how you fix wood grain.
No Plugins
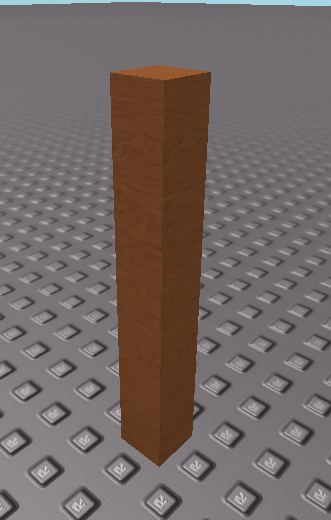
This first part is how you can fix wood grain with a completely stock version of ROBLOX studio, no plugins or anything, like I use to do for years before newer building plugins were a thing. The first step is to have some bad wood grain.
The second step is to change the wood grain to wooden planks.

Why? Simply put, wooden planks and regular wood have the same grain direction, and with the darker lines provided by the gaps between the planks, it can be easier to tell what way the wood grain is facing.


Step two isn’t a step as much as making sure you do everything right. Simple check the size of the brick you are fixing.
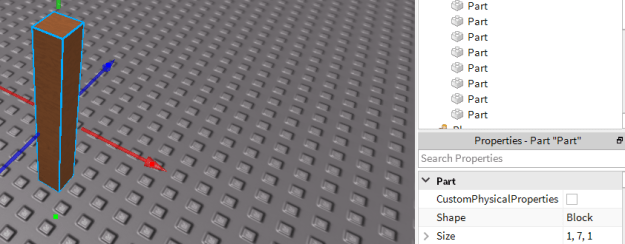
There are several ways to do this, either in notepad, sticky notes, mental notes, or making a duplicate brick and putting it some where to act as a reference point.

Notepad
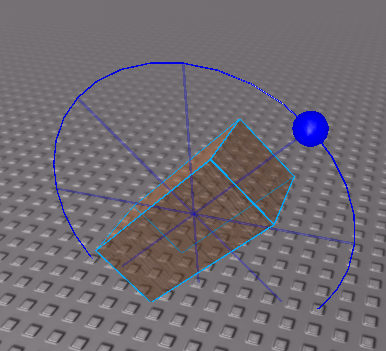
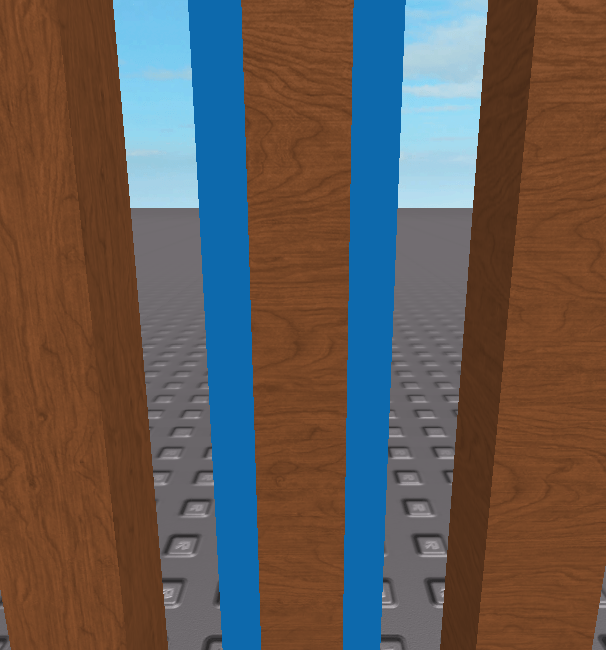
Next up is another option step in case you can’t tell what way the wood grain is facing. First, you need to resize the brick.

But don’t resize it all at once; do one side first.

Then the other side an equal amount. The ensures the center of the brick stays in the same exact place while rotating the brick.

And then resize the other two sides the same way. Again, this is optional, only do it if you can’t tell what direction you need to rotate the board for proper wood grain.

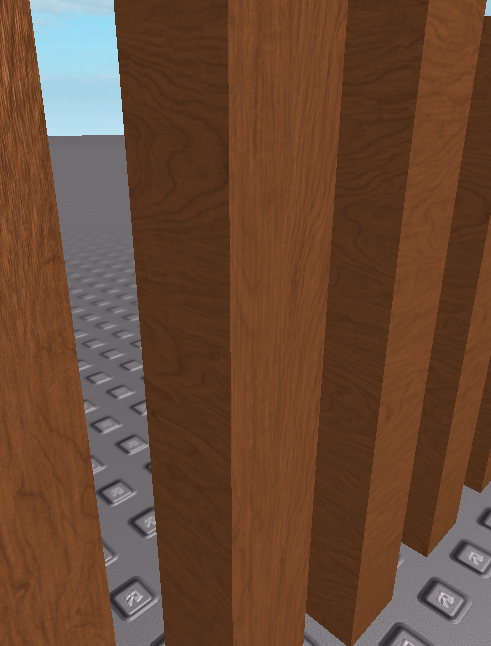
Next up you need to rotate the wood. Studio normal rotation amount means that that it should go an even 90 degree rotations, but if it does not change your rotation amount so it can do an even 90 degrees.
Next is a game of guess-and-check. Rotate the wood until it is finally at the correct orientation. This can vary based on how the wood was originally.

From here, simply resize the brick so it is back to its original dimensions. Remember, to keep the brick in the same position you need to rotate each side by equal amounts. So in this case, it was 3x3x7. To make it be 1x1x7, you need to resize the longest side by 3 studs each, and the short side by 1 stud each. Then to fix its height, raise the top and lower the bottom by 2 studs each.
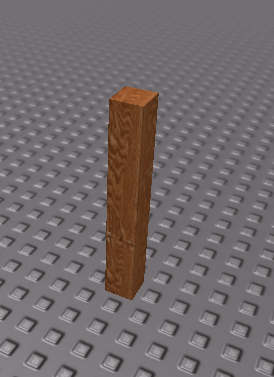
Then, in the last step, change it back to wood if that is what you want, and voila, proper wood grain.

CmdUtl
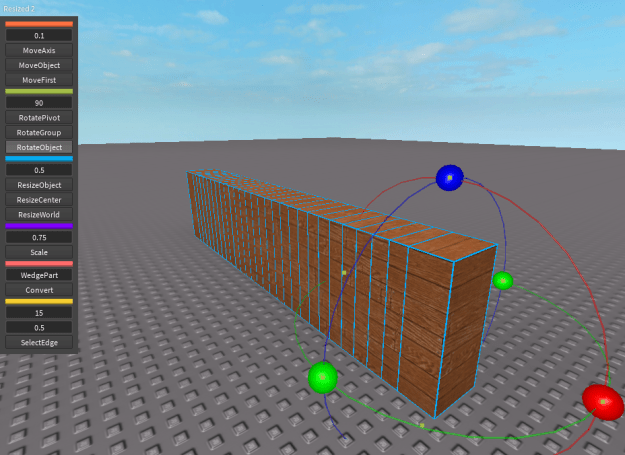
Next up is a slightly easier way to fix wood grain, but requires a plugin. Personally I prefer CmdUtl or one of its derivatives, such as Studio Build Suite, but any plugin that will let you rotate objects and resize from center should work. This is what I will be working with, a dozen or so bad pieces of wood grain. This can be fence posts, railings, chair legs, or anything that is repeated and exactly the same.

First you need to select them all. You can either alt+right click on each, select them in explorer, use a selection plugin, or drag and select them. I used the latter since there was nothing else I could accidentally select.

Next open up your building plugin.

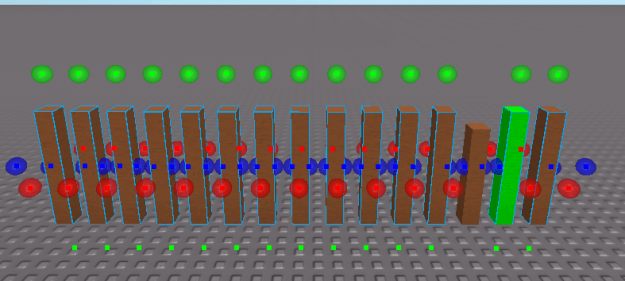
From here, repeat the above steps, with some minor differences. First write down the size of the parts. Then, when you go to resize them to make the wood grain larger, use the “Resize Center” button. This will resize them from the center of the brick, so resizing by .5, for example, will increase both sides by .25 studs. This helps ensure the center of the brick remains in the same place.

For most CmdUtl derivatives, this does it for every brick. Again, make sure your building plugin can do this. Next, you need to rotate them. Again, similar to the default studio steps, only this time use the “Rotate Object” tool. “Rotate Object” will rotate each object in price, while “Rotate Group” and “Rotate Pivot” will rotate the objects as a group, moving most of the bricks.
Then just keep repeating until they are in the correct orientation.

And then resize them, again resizing from center so they remain in the exact same spot. Once the size is correct, simply change the material and it is done.

Even though most people will want to use the Material Flip plugin, mass-fixing 100 or so bricks this way is much quicker than using the Material Flip plugin at times.
Material Flip
Next up is the simplest way. First, install and enable the Material Flip plugin by Stravant. Next open select it in studio and look at a brick in studio with bad wood grain.
The click on it and that face will have the material flipped 90 degrees.
Repeat until all sides are fixed. This usually requires 2 clicks per brick, but sometimes fixing one side will cause the orientation of the brick to change in the way that both sides are fixed at once.

Seriously, why did I feel the need to do a tutorial on how to use this plugin.
Control Panel
Next up is not a way to fix wood grain, but a way to select it. It is Studio Command Panel, and is a quick way to select multiple bricks. Once you select the bricks you want, you can then rotate and fix them with CmdUtl, whether it is 5 bricks or 5,000 bricks. After you install it, click on it to activate it, select a brick, and press “P”. This will open in up the panel.

Then just type in a command. For this, I’ll be using the “SelectSimilar” command. First up is the “Similar Appearance” selection. It shows up once you type “SelectSimilar”. “Similar Appearance” selects any bricks that have a similar color and material to the original brick, in this case the one on the far left. Because one brick is green, it is not selected.

Next up is the “Material” command. This will select all parts with a similar material, so the green one is selected. If you know all the wood in a place is incorrect, you can use this command.

Next up is color. Like appearance, it selects bricks based on color, but ignores material. In this case, it ignores the green brick again. I find this most useful because you can tag parts in a place you want ignored odd colors, like bright pink or green, and the selection will ignore them if they are good.

Next is by size. It ignores color and material, and only selects based on size. This is useful since when you go to fix the wood grain with CmdUtl you need the parts to be the same size, but it is not the most useful option.
The most useful selection tool is all. It only selects parts that are the same size, material, and color. This is the most useful because it can ignore non-wood parts, only select similarly sized parts, like size, which is needed to fix wood grain, and you can tag parts you want ignored with different colors to, well, ignore them.

This plugin is very powerful and can do many things. However, all I use it for is to select stuff, so that is all I have experience with.

Useful
LikeLiked by 1 person
Actually, you can resize from the centre without a plugin by holding control and dragging the scale bubble.
LikeLike
Thank you so much. Now I realize why my wood grain was off and why you keep criticizing the wood grain even though I didn’t quite understand what was wrong with it.
LikeLike
Thank you, I now know what bad wood grain looks like and how to fix it.
LikeLike